Overview
Cameras on smartphones have come on leaps and bounds recently, it seems to be the latest race in functionality, who can make the best camera. There are two thoughts around this, multiple cameras each serving a particular purpose, or the other thought is a single camera backed with AI (even if Google is the only one taking this path, they are doing a pretty awesome job.
With smartphone cameras becoming so good, more and more people are reaching for them as their go-to camera for photos and videos, after all, remember that famous saying: “the best camera is the one on you”? However, even though most smartphones cameras are packed with awesome hardware, the support software camera apps don’t allow access to all of their features, thus meaning that footage taken on a smartphone always looks like it has been taken on a smartphone, and this is where Filmic Pro App comes in.
Filmic Pro provides access to features of the camera enabling granular control of the settings e.g. manual focus, shutter speed and ISO (to name a few). all of which will enhance that cinematic effect your are looking for.
Before You Start Recording
In order to get the very best from your smartphone and FilmicPro, there are some settings always worth checking and setting prior to recording. These are the same rules applied when using DSLR or other filming equipment, by also performing them on a phone will get you that cinematic effect and less of the phone look.
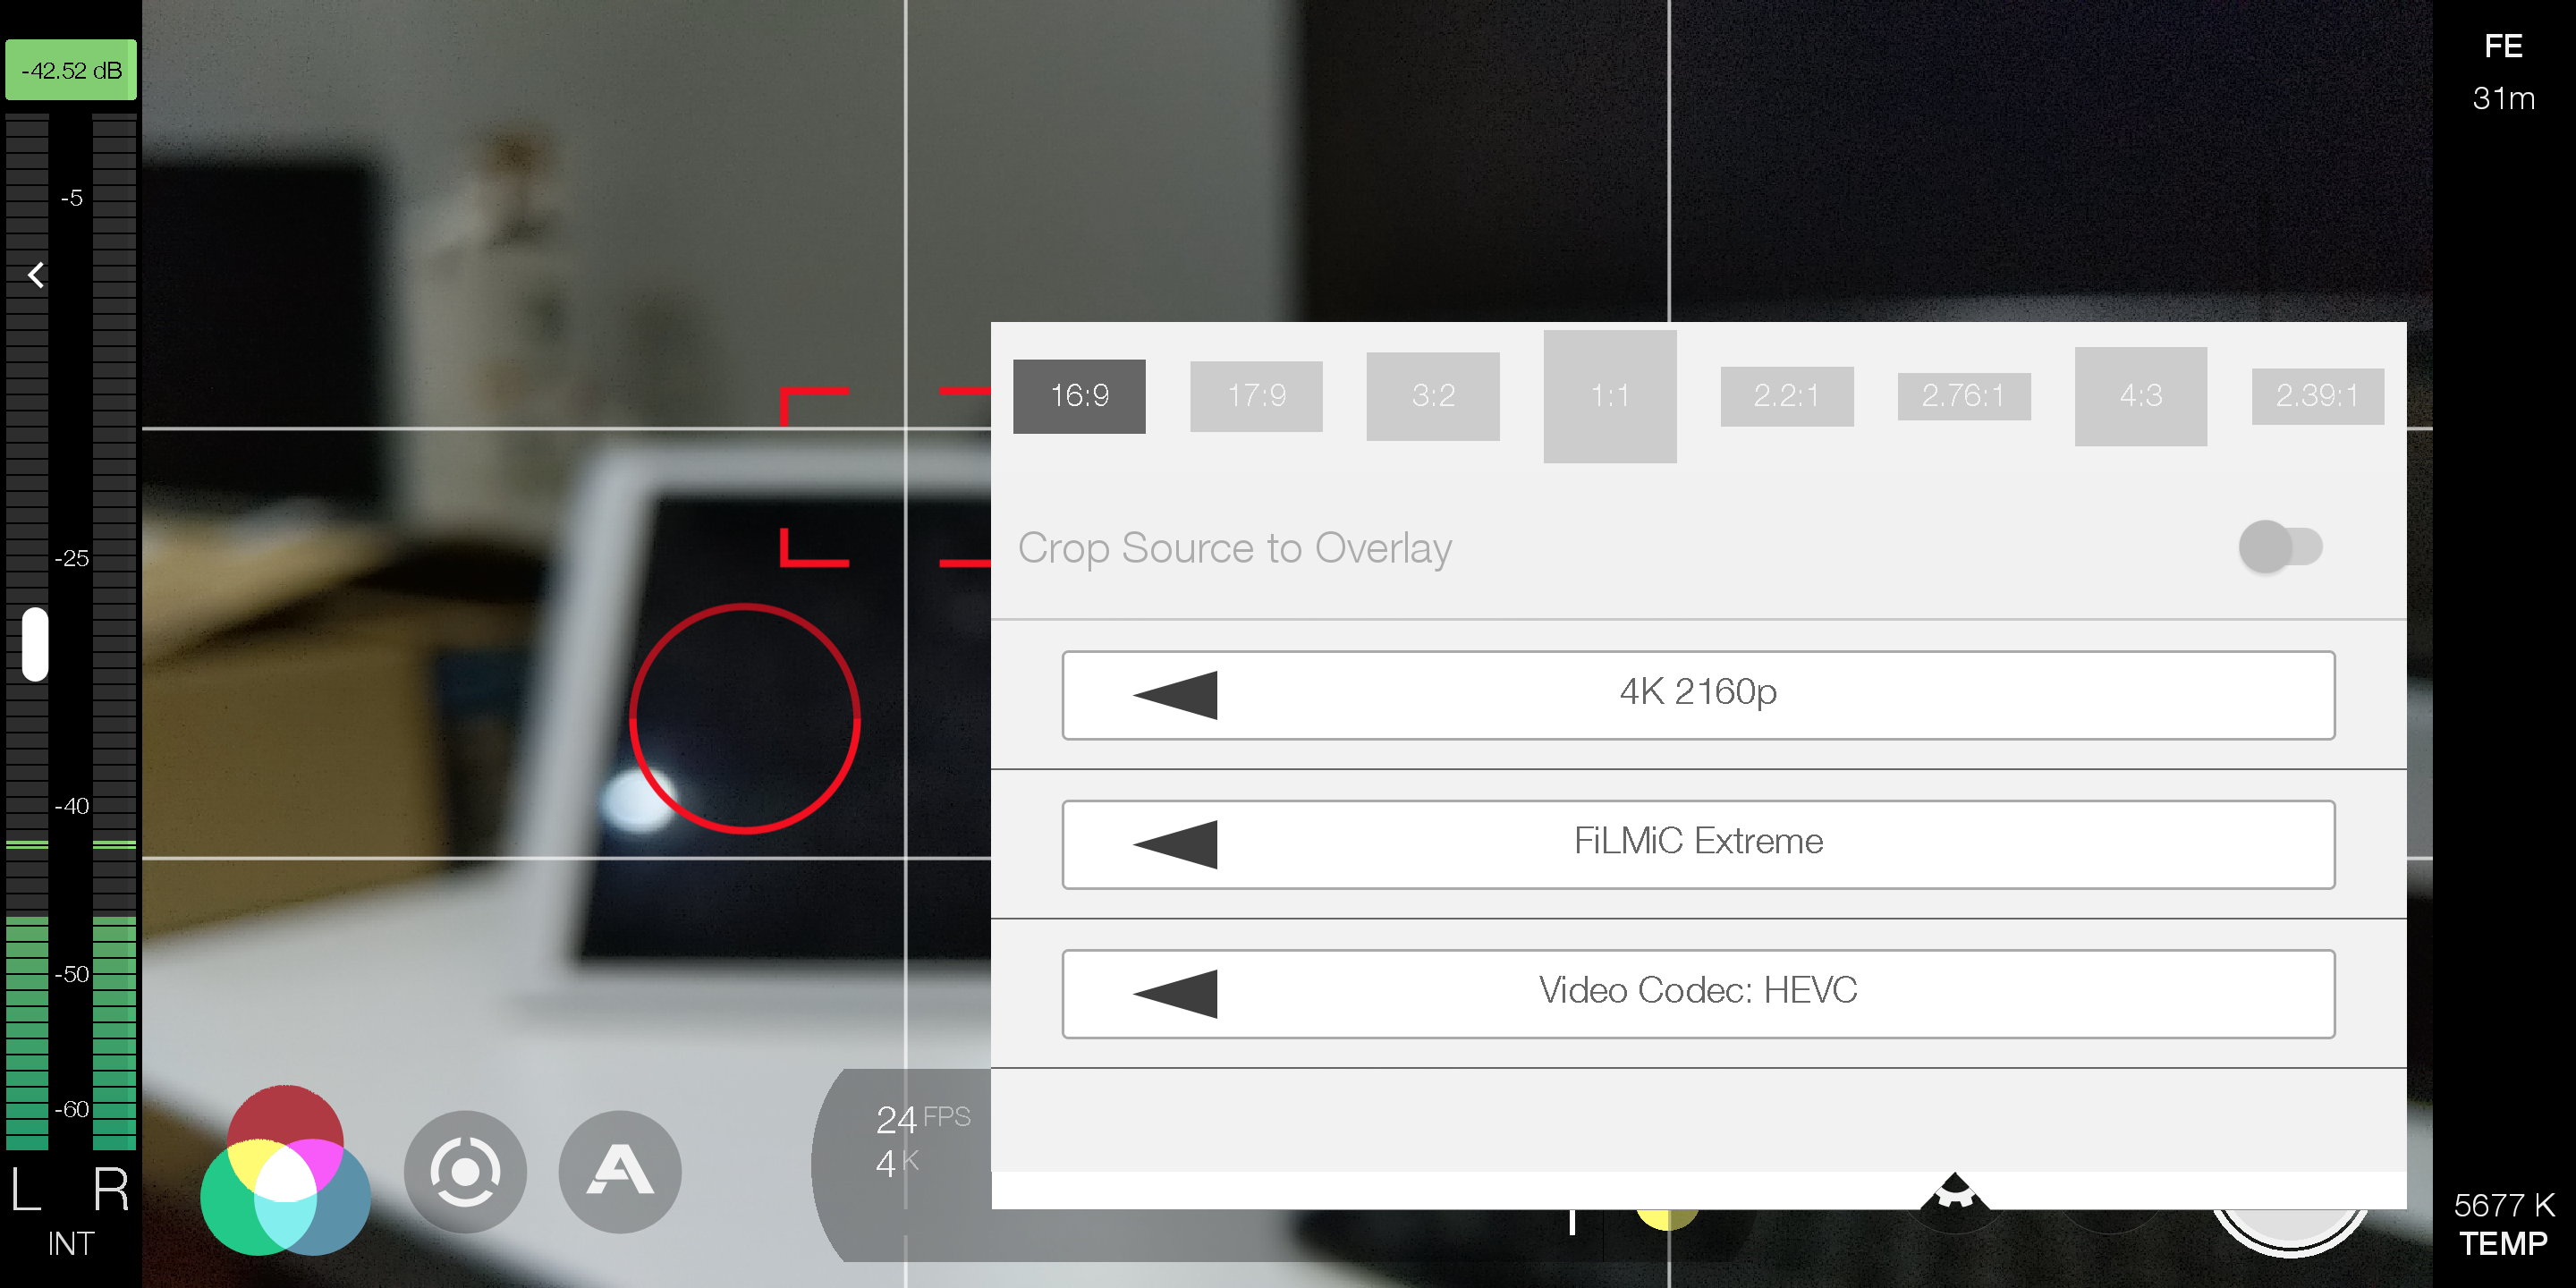
Resolution: This is dependent on the capabilities of the phone, however the higher the setting, the most pixels are used, thus quality. I would film in 4K as a rule unless utilising features that require me to drop resolution e.g. slo-mo. Bit-rate is also important, this determines the quality of the 4K too, Filmic Extreme means 100Mb/s are used for recording.
The other settings here can be left as default (however you can chose the codec too from H264 to H265 – HEVC) This will provide higher quality and a smaller file size, just be warned that not all editors support this codec format. You can also set the aspect ratio and crop for even more cinematic effect.
This setting is useful if all the footage is going to be in film ratio format. If some is to be non-cinematic, set this to 16:9 and apply the aspect ratio in post. Just remember applying letterbox bar in post does not change the aspect ratio, it simply applies black bars which will appear in all videos including on screens that match the correct ratio. My default settings: 4K, 100Mb and HEVC.
Frame Rate: The next setting to work with is Frame Rate, this determines how many images per second are taken during filming. For that buttery smooth cinematic look the recommendation is to utilise 24FPS were possible, unless you are looking at slow-motion.
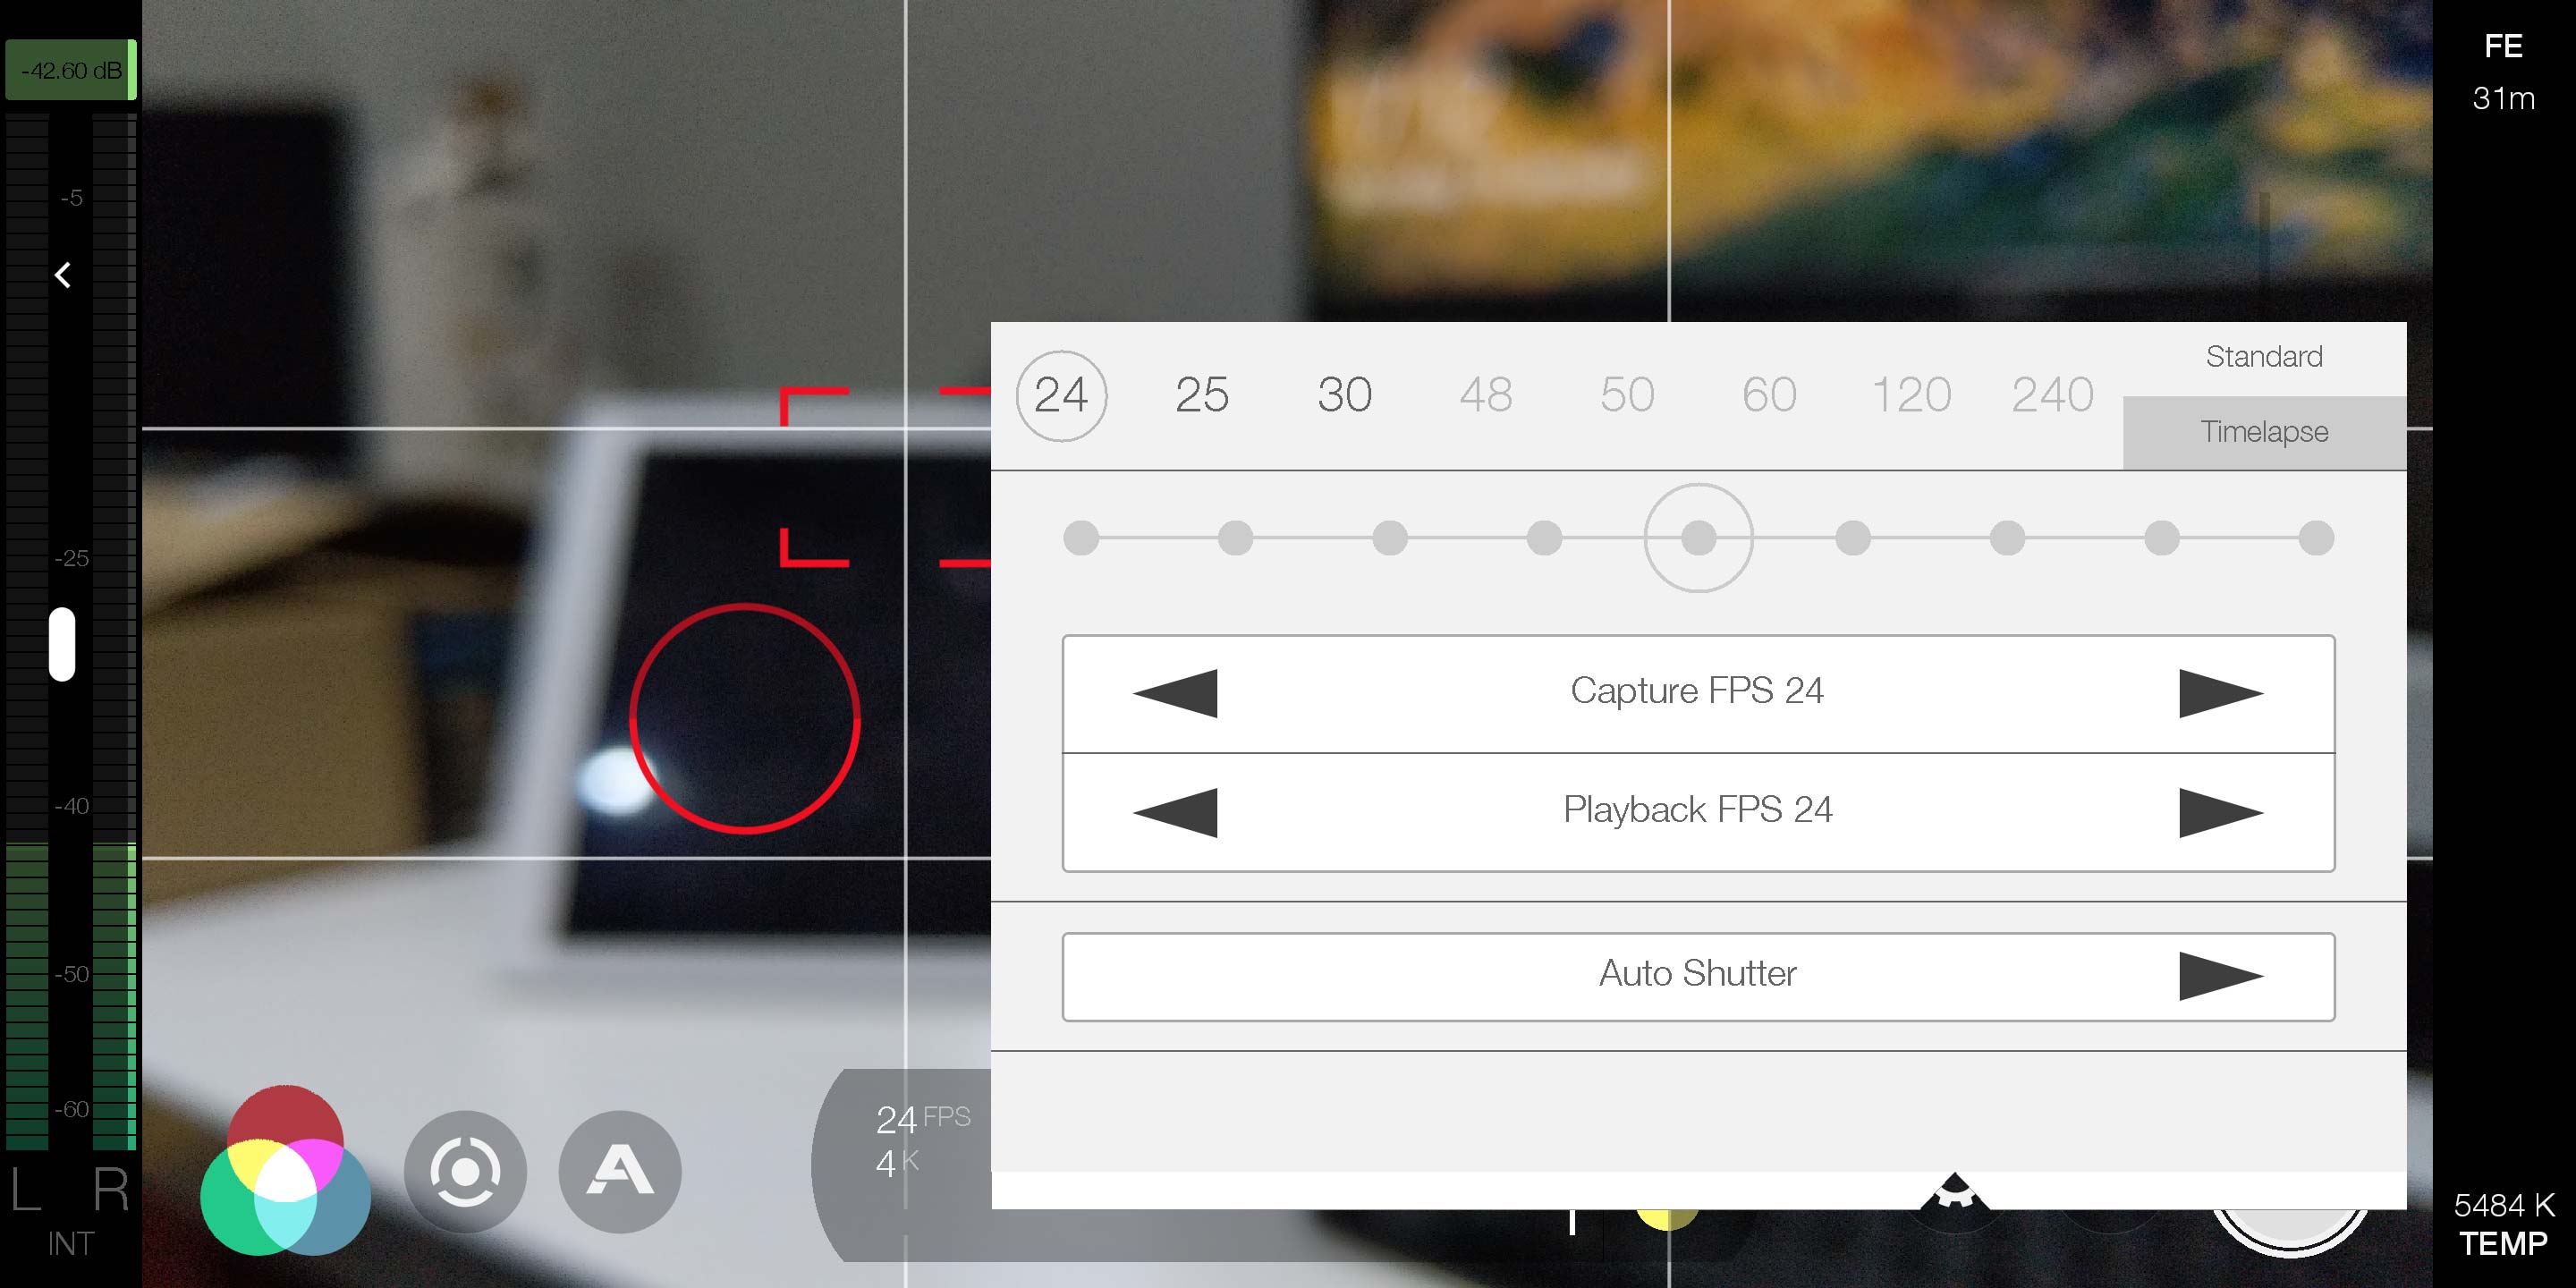
24FPS creates some motion blur unlike the higher FPS and therefore provides a more realistic feel, when the motion is too crisp it starts to look fake and our eyes cannot relate to the motion, thus 24 FPS provides the best for normal motion capture. There is nothing wrong however using the higher FPS to capture slow-motion where the action needs to be slowed down in order to fully understand story line etc. For example; a scene with a car drifting is far better captured slowing down the action. Recommended Setting: 24 FPS.
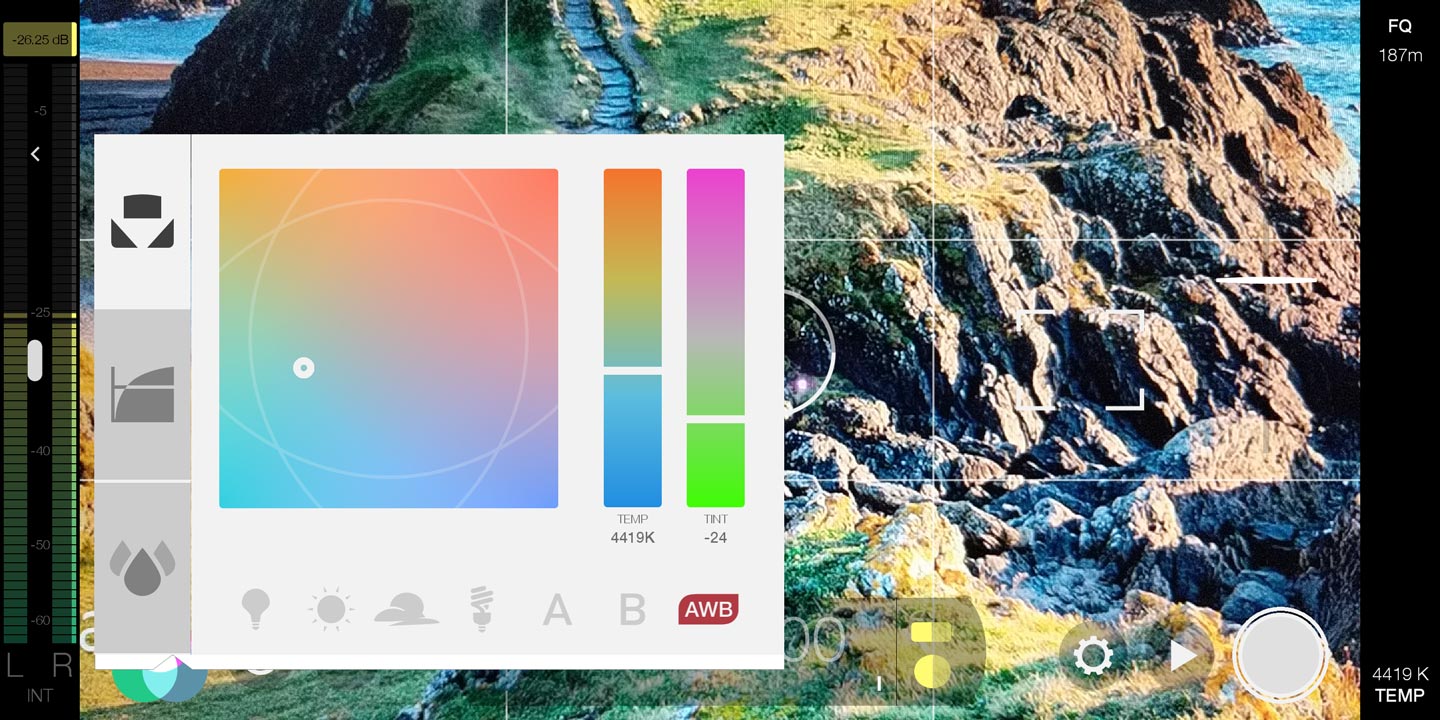
White Balance: Next up is white balance and Filmic Pro has a wide variety of options here. The usual presets can be used for indoor lighting etc, however the best option is to use the Auto White Balance (represented by the AWB. Press this again and it lock AWB to the current setting, very useful as you really do not want the white balance changing mid shot. Recommended Setting: AWB locked
Contrast & Focus: By default these are set to automatic and can be easily adjusted by moving around the two reticles on the screen. The circular reticle sets the contrast values to wherever it is currently located. Click on this again will lock the contrast whilst released again. The same is true for the focus reticle move this around the screen to gain the correct focus, Lock focus by pressing on the reticle. You can tell they are locked when they change to red.
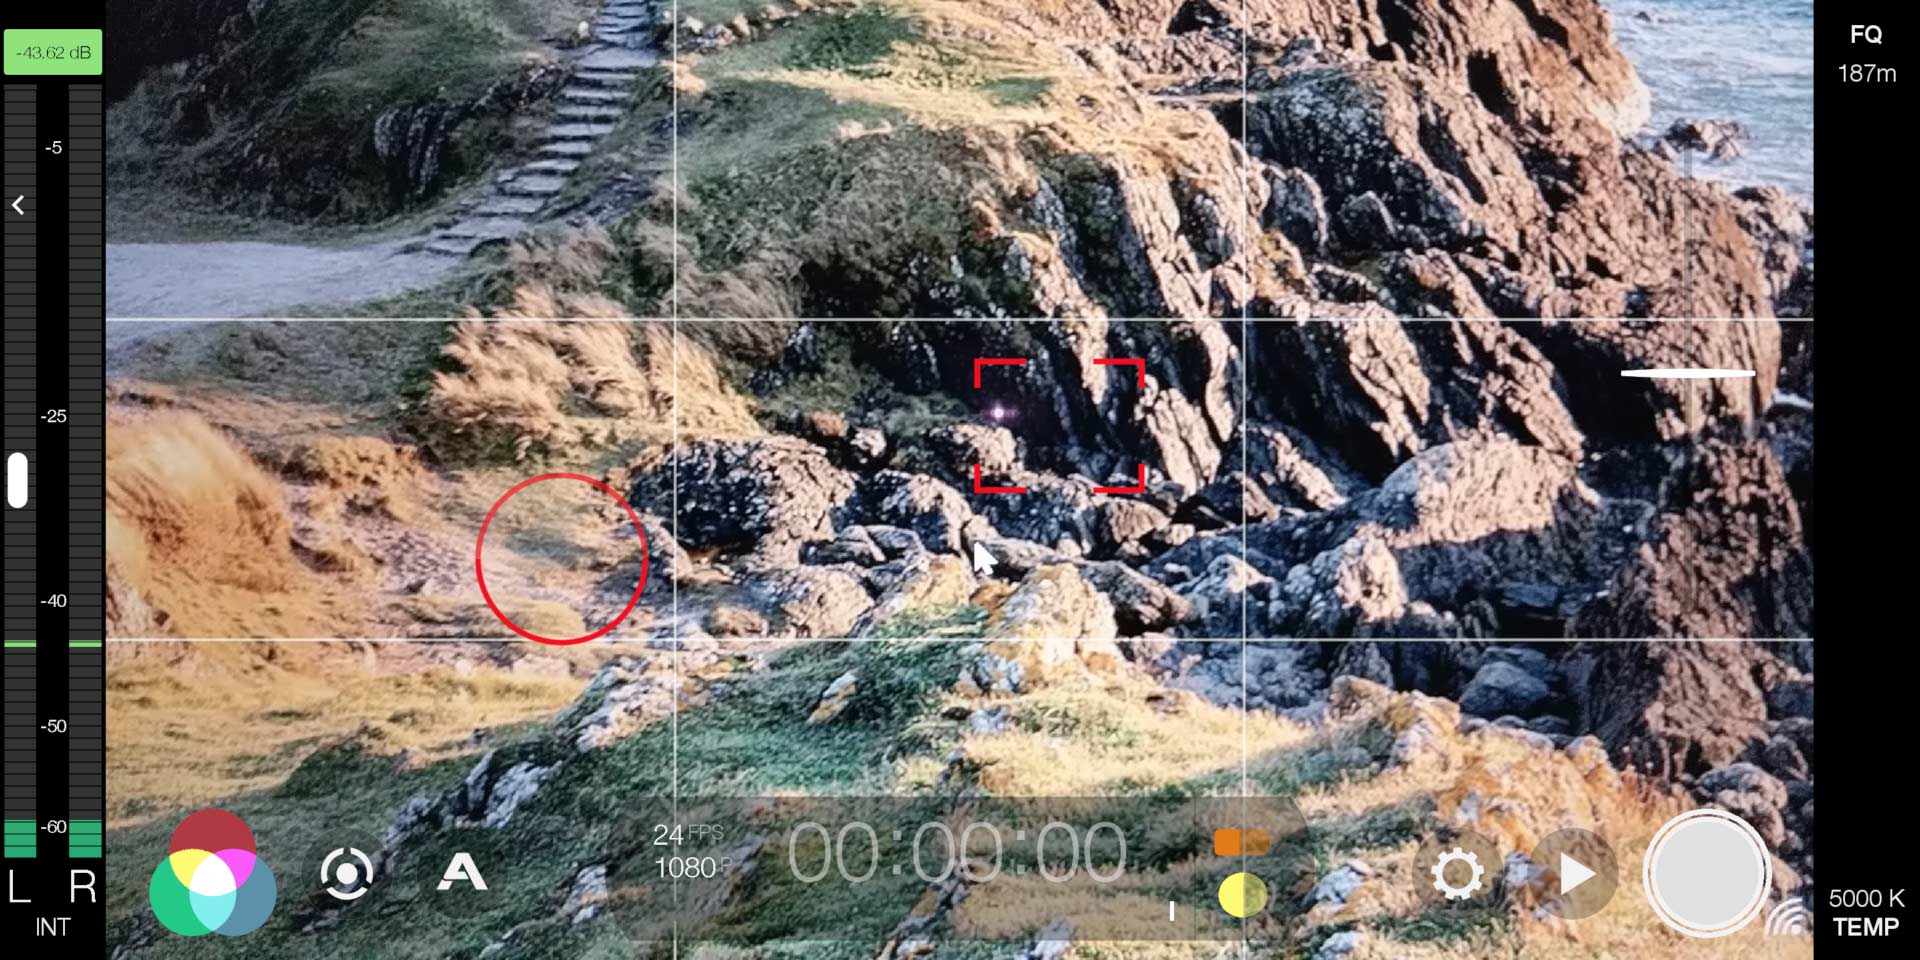
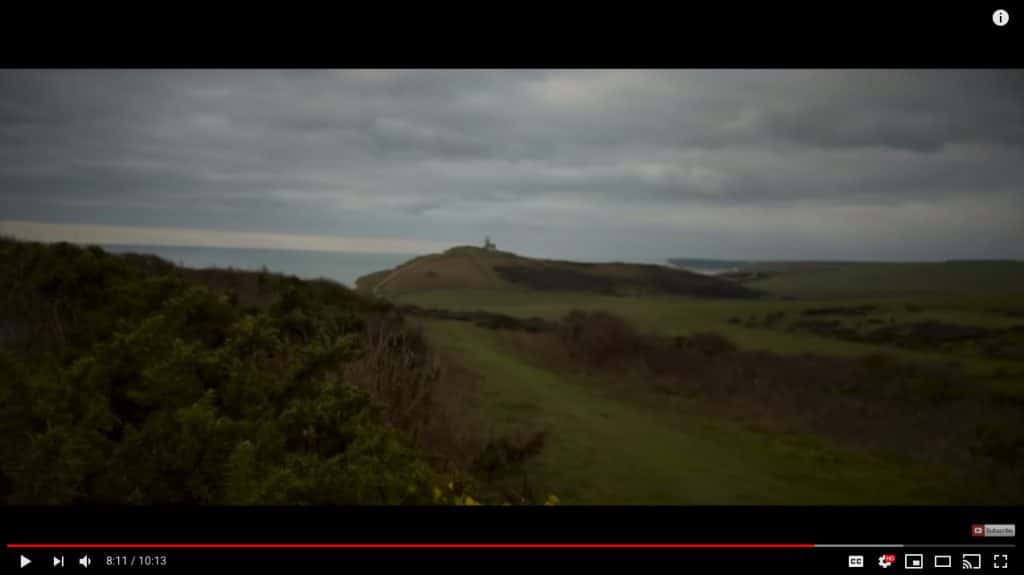
The added bonus with the reticles, it allows you to shoot in several modes e.g. fully automatic, hybrid (where one reticle is set manually) and full manual mode where all settings are manually configured. I would note though, if you are going to use fixed focus, remember to remove the fixed focus again, otherwise you will end up with some very blurred footage – school-boot error, but one easily made when you are filming all those different shots within a limited time frame (note the screenshot from our latest video, where the focus was fixed in error). Recommended Setting: Contrast Reticle set manually, focus set to automatic.
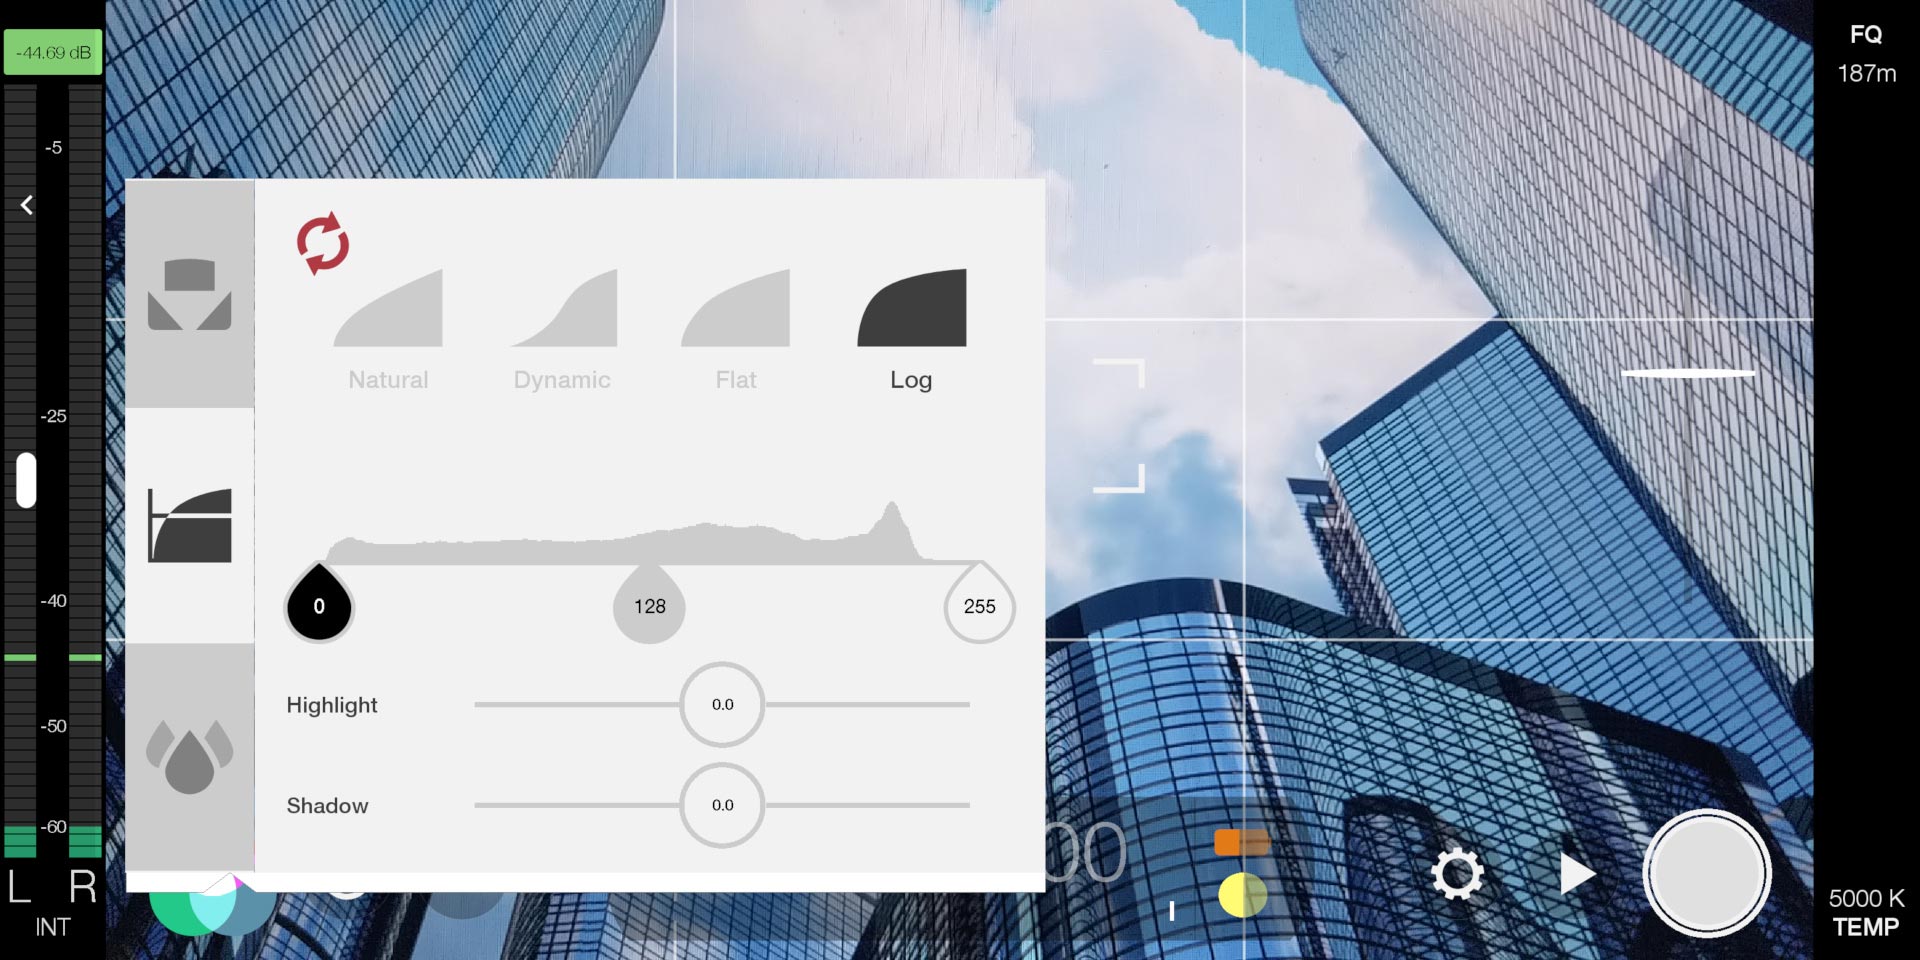
Film in Log Mode: If you know how to colour grade in post, then this one is for you. Filmic Pro allows you to film in Log V2 mode, meaning that your footage contains two more stops in dynamic range. The initial footage may look more washed out (or flat), but this is normal, once brought into either Premier or Final Cut, a colour grading or LUT can be applied to provide a true colour and cinematic look without loosing the high-lights or shadows.
LUT packs are available from Filmic Pro and provide everything you need to get yourself going with the colour grading, however note that Cinematic features e.g. Log are only available via an in-app purchase, however this is still well worth it.
Manual colour grading is possible in post, however indepth knowledge is required to achieved similar results that a LUT would provide.
A trick to perform in post is to first ensure that your levels are correct and that your are not over or under exposed the footage. This is achieved via analysis of the waveforms, in particular the LUMA waveform.
Using your chosen editing solution, analyse the waveforms and ensure that the shadows are above zero and the highlights are not topping out beyond 100, otherwise you will start loosing image quality from either the whites or blacks. Once all footage is correctly balanced, apply and adjustment layer and apply the LUT (this will ensure that same look is achieved across all clips on the timeline.
Stabilisation & Gimbals: Smartphone gimbals are becoming a common tool to utilise, with our preferred one being the DJI OSMO Mobile 2 (Click here for our review), however these contain some advanced stabilisation technologies that can often conflict with the digital image stabilisation in the smartphone. The default apps are unable to turn this setting off in the phone, so you can often experience some strange warping at the edges of the footage as the two stabilisation technologies compete. Filmic Pro enables functionality to disable part of the camera stabilisation (although is unable to disable OIS). In the hand, this footage will become very shaky, however put this into a gimbal and the footage becomes buttery smooth. To disable stabilisation, click on the settings icon and select stabilisation in the bottom left, and then experiment with how this affects your camera footage.
There are so many more features that this app can offer, that this article would become way too long. If you would like to check them out yourself, please review the Filmic Pro Manual on their website: http://www.filmicpro.com/FilmicProUserManualv6.pdf